

DTF printing is a new and easy way to print designs on fabric. It is getting very popular. Many people use it to print t-shirts, hoodies, bags, and more.
Want to know how DTF printing works? This article will guide you step by step and show you why it’s such a popular choice. Let’s get started with the LINKO DTF printer!
What is DTF Printing?
DTF means Direct to Film. In this method, you print your design on a special film. Then, you heat-press it onto fabric.
It is different from other printing methods. You do not print directly on the fabric. Instead, you transfer the print from film to cloth.
It works on:
- Cotton
- Polyester
- Nylon
- Blends
It gives bright colors, sharp details, and strong prints.
Why Choose DTF Printing?
DTF printing has many good points:
- Easy to learn
- Works on many fabrics
- No need to pre-treat clothes
- Strong and stretchable prints
- Great for small or large batches
Now, let’s see the steps to do DTF printing.
Step 1: Create or Choose a Design
First, you need a design. You can create it using software like:
- Photoshop
- Illustrator
- CorelDRAW
- Canva
You can also use ready-made designs or buy digital artwork online.
Make sure your design has:
- High resolution (300 DPI or more)
- Transparent background
- Bright and bold colors
Once done, save the design as PNG for best quality.
Step 2: Set Up the Printer
You need a DTF LINKO to print your design on film. Some DTF printers are made just for this job. Some are converted from inkjet printers like Epson.
Make sure your printer is filled with DTF inks:
- White
- CMYK (Cyan, Magenta, Yellow, Black)
Also, make sure your software (called RIP software) is ready. RIP software helps the printer handle white ink and color layers.
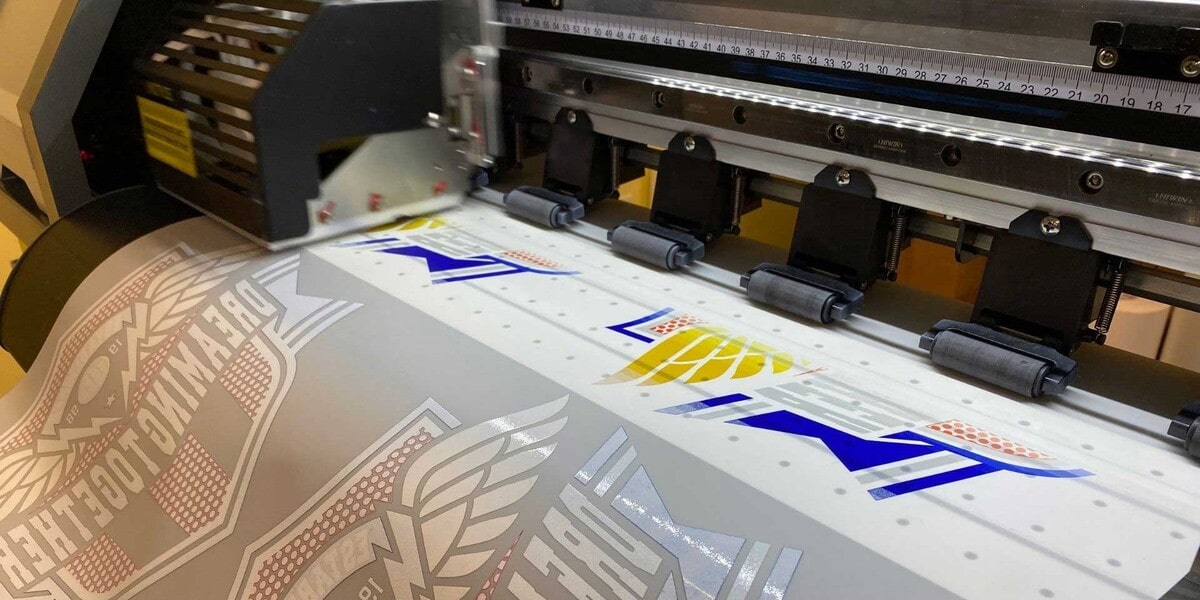
Step 3: Print the Design on Film
Next, place the DTF transfer film into the printer. The film is smooth and precise.
Your printer will:
- Print colors first
- Print white ink on top of the colors
This makes the design strong and bright when it is transferred to fabric.
After printing, let the film dry for a few seconds.
Step 4: Apply DTF Powder
Now it’s time to apply DTF hot melt powder.
This powder is essential. It helps the design stick to the fabric.
Follow these steps:
- While the ink is still wet, sprinkle the powder over the printed side.
- Make sure the powder covers the whole design.
- Shake off the extra powder.
The powder will stick only to the ink, not the transparent film.
Step 5: Cure the Powder
Now you need to melt and cure the powder.
There are two easy ways:
- Use a curing oven
- Use a heat press machine (hover, don’t press)
Such as set the temperature to around 160–170°C (320–338°F). Heat for 2 to 3 minutes.
The powder will melt and form a sticky layer over the ink.
Now your DTF film is ready for transfer!
Step 6: Place the Film on Fabric
Take your fabric (like a t-shirt) and place it flat on the heat press machine.
Then place your DTF film on top of the fabric. Make sure the design is facing down and in the right spot.
Step 7: Heat Press the Design
Now is the time to press the design of the cloth.
This manner:
Set summer time press at one hundred sixty-170 ° C (320–338 ° F)
Set the time for 15-20 seconds
Use a slight faucet
After urgent, cast off the cloth from the heat press and allow it to cool.
Step 8: Peel the Film
Once the fabric is cool, peel off the film slowly.
The design will now stick to the fabric. You will see a bright, clean, and strong print.
This is called a cold peel process.
Step 9: Do a Second Press (Optional)
For better strength and softness, do a second press.
- Cover the design with a Teflon sheet or parchment paper
- Press again for 5 to 10 seconds
This helps the print last longer and feel smoother.
Final Result
Now you have a finished product with a beautiful print!
The print is:
- Washable
- Stretchable
- Soft to the touch
- Long-lasting
You can use DTF to print:
- T-shirts
- Hoodies
- Sweatshirts
- Tote bags
- Pillow covers
- More!
Tips for Best DTF Prints
- Always use high-quality films, inks, and powders
- Keep your printer and printhead clean
- Store printed films in a dry, dust-free place
- Do test prints before bulk printing
- Follow the correct temperature and time settings
Who Can Use DTF Printing?
DTF printing is excellent for:
- Small business owners
- T-shirt brands
- Print shops
- Hobbyists
- Clothing designers
You don’t need a big budget to start. Many home-based businesses use DTF to make money.
Conclusion
DTF printing is a fast and straightforward way to print on fabric. It gives you high-quality, colorful, and strong prints.
Let’s review the DTF printing steps:
- Make or choose a design
- Set up the printer
- Print the design on film
- Add hot melt powder
- Cure the powder
- Place the film on fabric
- Heat press the design
- Peel the film
- Do a second press (optional)
If you need to begin a T-shirt business or print your clothes, DTF is a super option.
Try it and experience printing as a supporter!


